
Nutrient Required for Optimal Soybean Production
There are a number of nutrients which are essential for plant growth. A number of them are obtained from the atmosphere through photosynthesis while the rest are obtained from the soil.
Nutrient elements obtained from atmosphere through photosynthesis:
- Hydrogen
- Carbon
- Oxygen
Nutrient elements obtained from the soil:
- Nitrogen (N)
- Phosphorus (P)
- Potassium (K)
- Sulfur (S)
- Magnesium (Mg)
- Calcium (Ca)
- Iron (Fe)
- Boron (b)
- Manganese (Mn)
- Zinc (Zn)
- Molybdenum (Mo)
- Copper (Cu)

Concentrations of these elements can vary a little between different species, but overall there are general requirements given of plants.
Nutrients required in greater quantities are noted as macronutrients and the elements required in lesser quantities are classified as micronutrients. This doesn’t mean one nutrient is more important then another for plant growth, but instead shows how they are required in different quantities. If any nutrient is deficient the growth of the entire plant will not reach the maximum yield. This phenomenon is known as the Law of the Minimum.
This is how nutrients are usually classified. Macronutrients: N, K, Ca, Mg, P and S |
To further classify the macronutrients; nitrogen, phosphorous and potassium are called primary nutrients while sulfur, magnesium and calcium are called intermediate nutrients.
In Nebraska, some of the main nutrients producers are concerned with and manage are Nitrogen, Phosphorous, Potassium, Sulfur, Zinc and Iron. Soybeans remove different amounts of these nutrients for plant growth.
Soil Testing
Soil testing is a practical means of using physical and chemical analyses to get a representation of nutrient levels and properties of the soil. When taking soil samples to be tested, it is important to use the proper method and techniques so the test results will be an accurate depiction of the soil. Once this information is attained effective management decisions can be made.
"Cores"
A cylindrical sample of soil for tests and examination.
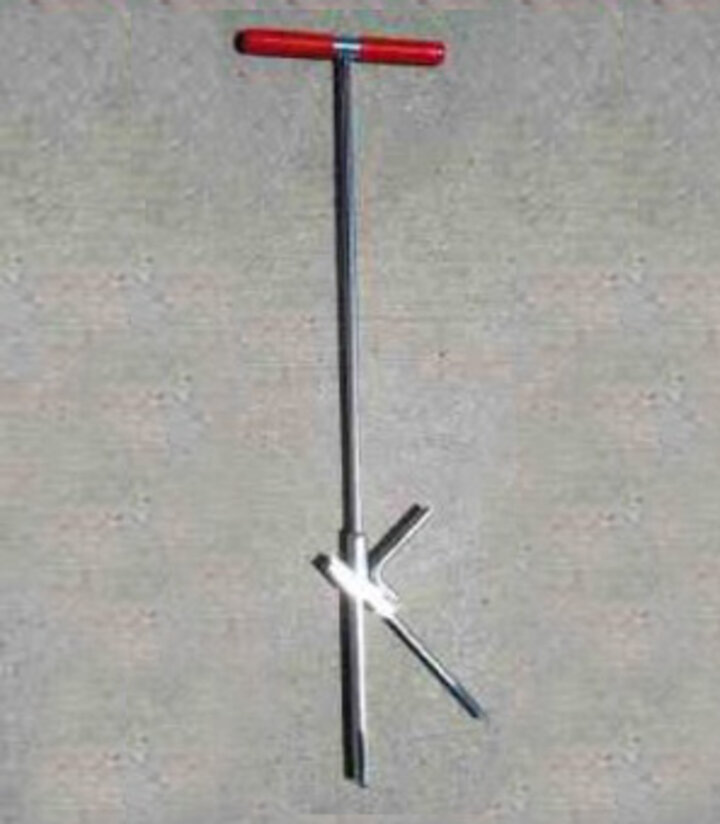
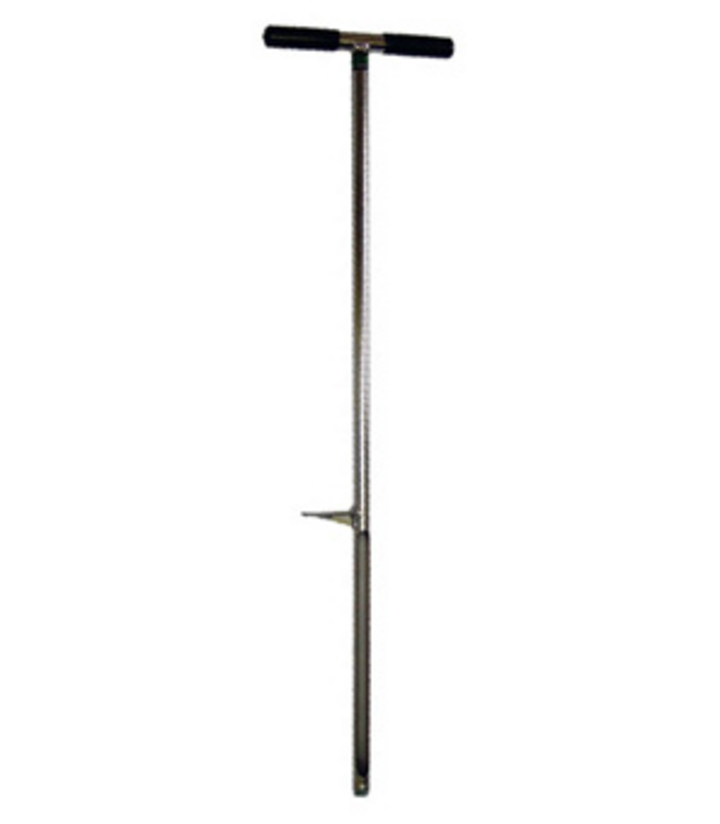
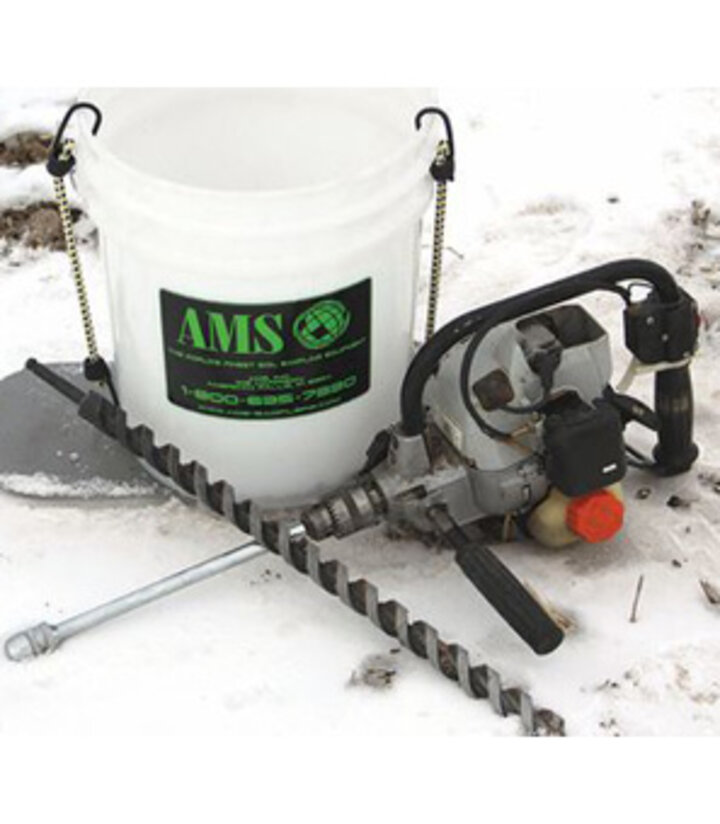
Sampling Device:
What exactly is a sampling device and how do you use one?
Watch this video to find out!
Go to videoOne of the first details you need to determine is what type of sampling device you intend to use. There are several different devices available to use depending on the characteristics of the soil and the type of soil sample that is be taken.
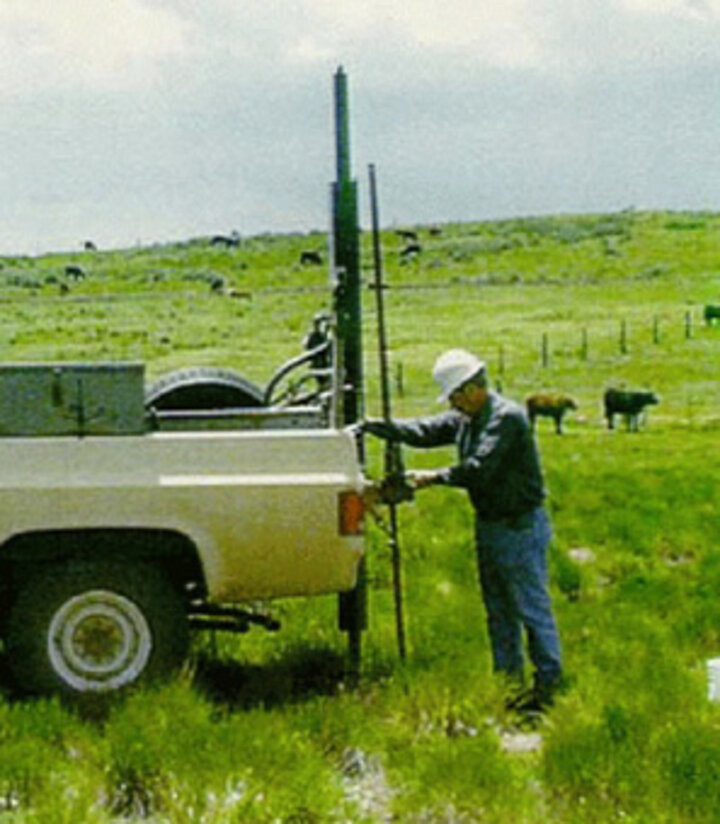
"Hydraulic"
Denoting, relating to, or operated by a liquid moving in a confined space under pressure.
After you have decided on what type of device you will use, the next step is to develop a sampling procedure.
The best time of year for soil sampling will vary depending on which type of crops are being grown and what crop system is in place. For a soybean system, the preferred sampling time would be during spring prior to planting. This will give you the best representation of what the soil will be during the growing season. Fall or winter sampling is also acceptable. This will give you more time to analyze results, make management decisions, and avoid the busy time for labs in the spring. A downside to early sampling is that it gives more time for nutrient level and soil properties to change. Excessive rainfall can leach away more mobile nutrients such as nitrogen. Once a sampling time is chosen it is best to sample at this time from year to year for consistency.
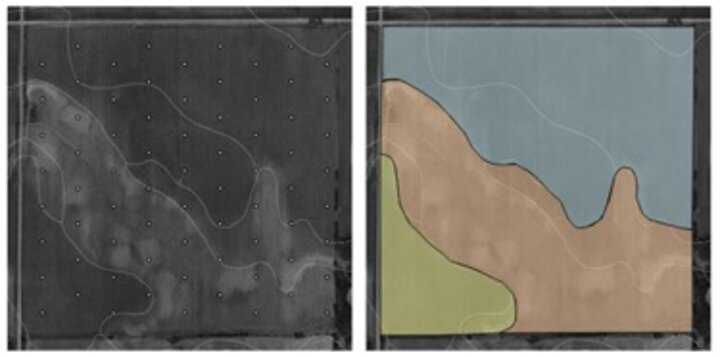
Coming up with a method to determine where samples will be pulled within a field will depend on the situation. There are two main different methods of sampling. One is called zone sampling in which parts of the field that have similar characteristics are designated into zones. Samples taken from each zone are composited together to make up one representative sample. A zone should be no larger than 40 acres. The other is grid sampling in which samples are taken from smaller sections in a uniform matter across the field. A typical size for a grid sample to represent is 2.5 acres.
Surface Soil Samples:
How are surface soil samples gathered?
Watch this video to find out!
Go to videoZone sampling (Figure 7b) can provide an accurate portrayal of the average nutrient levels in the field at a reasonable cost. Grid sampling (Figure 7a) can provide an even better representation of the soil across the field but is more costly due to more samples being tested. Grid sampling is useful with the use of precision technology.
Deciding on what depth the sample will be taken is very important as nutrient levels and properties can vary greatly within a few inches of soil. Sampling depths will vary depending on what type of system you are working with and the information you need. It is important to check what depth the fertilizer recommendation resources you will be using are based on. Typically for a soybean field system surface soil samples are taken at an 8-inch depth.
It is recommended that between 10 and 15 actual cores be randomly collected across the certain zone or grid to make up one sample. It is important that when these cores are collected random sampling takes place so an accurate representation of the soil can be attained. When taking soil cores it is best to avoid such irregular areas such as field borders, draws, terraces, fence rows, roads and manure spots.
When combining the cores to make up one sample it is best to use a plastic pail or container. Metal buckets will interact with the soil and skew results. Break any lumps, remove any rocks, and mix well. If soil samples are wet allow to air dry before sending in to be tested. Avoid using heat as this will also alter the soil and results. Fill the sample bag or box, label, and then it will be ready to be sent in to be tested. It is important to use correct labeling so you know what samples represent what part of the field. Once the lab is done conducting analysis on the soil, they will send back the results for you to use to help make management decisions.
"Skew"
Make biased or distorted in a way that is regarded as inaccurate, unfair, or misleading.
Explore More!
For more information on taking soil samples, go to the CropWatch Youth page, which has soil testing guides, YouTube videos and lesson on a variety of soil quality measurements!

Nebraska Soybean Board graciously provided the funding for the Soybean Management Guide.
Course authored by:
Amy Timmerman, extension educator; Aaron Nygren, extension educator; Brandy VanDeWalle, extension educator; Loren Giesler, Plant Pathologist Department head; Ron Seymour, extension educator; Keith Glewen, former extension educator; Charles Shapiro, emeritus extension soil scientist; Amit Jhala, extension weed specialist; Don Treptow, former graduate student