Excel® is a robust computer program for multiple tasks, from creating personal budgets and supplemental accounting documents to troubleshooting accounting software and even programming some software. With all that it offers, many of us still only use a fraction of its features. This series — Excel Pro Tips — covers some of the best formulas, tables, conditional formatting, and other processes to benefit users. Today’s article looks at the use of new windows to view multiple spreadsheets or the same sheet in a single workbook, all at the same time.
Background
As our workbooks get more complex, it often becomes necessary to review different parts of a spreadsheet or different spreadsheets in the workbook. Typically, we might click from spreadsheet tab 1 to spreadsheet tab 2, or, if on the same spreadsheet, scroll up, down, left, or right constantly as we navigate to the information we need to finalize that fantastic new formula. The problem is the wasted time. If only there was a way to have two spreadsheets of the same workbook open at the same time, or the same spreadsheet open twice but showing different locations. We are in luck because that feature does exist and it is excellent.
Multiple Windows
A conventional setup for a workbook will be to have an input spreadsheet for the first tab where all the variable information is located. This spreadsheet will be referenced in nearly every formula. As we start building our statements on spreadsheet 2, 3, and 4, let’s keep spreadsheet 1 open and viewable so that we can fly through formula development.
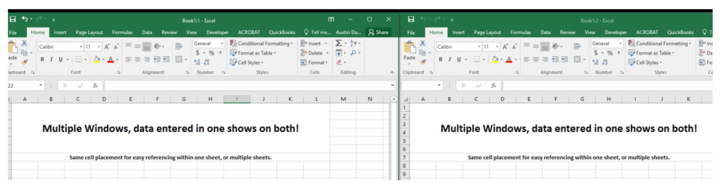
In the Excel ribbon in the upper menus we will find Home, Insert, Page Layout, and one that reads View. Click on that, and new possibilities will show up. The one in particular we want is in the Window section. Click on the New Window button. At first, we may not notice that anything happened, but if we click on the shrink button in the upper right, we will see that two exact copies of our workbook are now open. If we look at the top center of each, we will see the file name followed by 1-Excel and 2-Excel. Now try typing something in 1-Excel. It shows up in 2-Excel too, doesn’t it? Both will update and change as information is entered. Now we can switch 2-Excel to be spreadsheet two where we are building our formulas, and 1-Excel can stay on spreadsheet one where all the input data we want to reference is.
Split the Window
Now let’s say we just want to work on the same spreadsheet, but not have to scroll left, right, up, and down continuously as our report is rather large. There is a solution to that as well. If all we want is to keep the Column or Row headings visible, go under the View tab in the ribbon and click on Freeze Panes. Three options will pop up:
- one option will hold Row 1 and Column A visible at all times,
- one will keep just Row 1 visible at all times, and
- the last will keep Column A visible at all times.
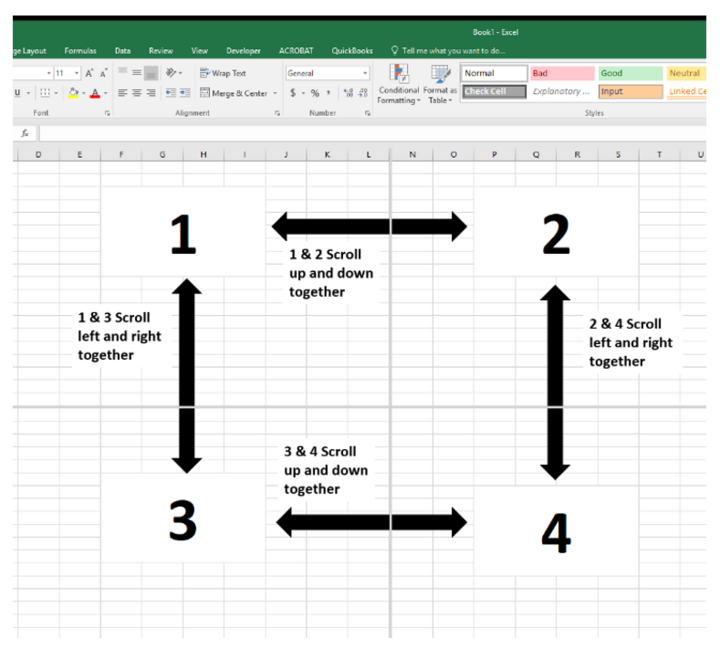
What if we need more than that? Go back up to the View tab and select the Split button. Depending on the active cell placement, we will be given either two or four independent quadrants of the same spreadsheet. These can be moved around somewhat independently, allowing for multiple sections of the spreadsheet to be shown at the same time.
With that in mind, have fun!
Got a Question?
Please email me at aduerfeldt2@unl.edu with topics for future articles.